The humidity and the frequent rain in Singapore can contract and expand the paint, cracking it badly. That ruins the appearance of your house and exposes it to more mold and mildew, which could be a health hazard.
To help you professionally tackle all these issues, we’re going to give you a step-by-step guide on how to fix cracked paint in Singapore with ease and stop it from getting worse. Also, LS Painter Singapore offers the best residential painting, house painting, and commercial painting services in Singapore.
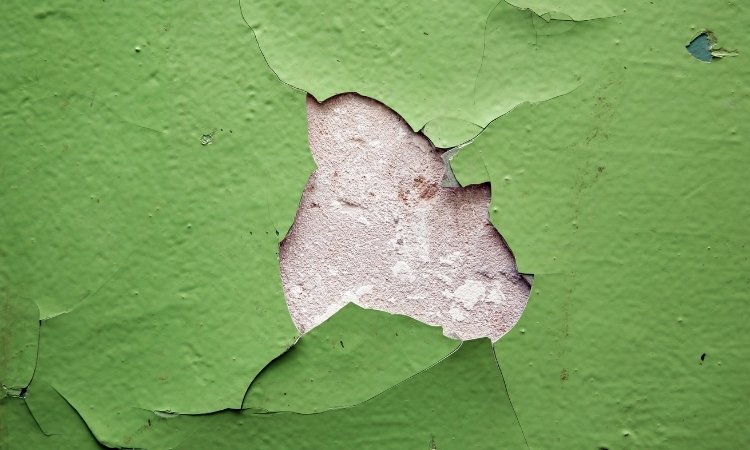
Why does Paint Crack in Singapore?
Your paint could crack in Singapore because of these common reasons:
- High Humidity and Moisture
The high humidity and the moisture of Singapore get trapped under the walls. Over time, gradually, it weakens the paint and causes it to crack or peel off. - Frequent Rainfall and Water Seepage
There’s a lot of frequent rain in the country because of which the water seeps into the walls making the paint lose its grip. If you use poor-quality paint that isn’t waterproof, then that happens. - Thermal Expansion and Contraction
Singapore is too hot in the day and too cold at night causing the paint to contract and expand. That weakens the layer of the paint that, overtime, causes cracking. - Poor Surface Preparation
If you didn’t prepare well for the painting, like removing the dirt, dust, or old flaky paint layers, it also cracks the paint. - Low-Quality or Wrong Paint
If you’ve used cheap or incorrect paint on your walls, then that also leads to cracking. When you use the interior paint on the exterior or one that isn’t weatherproof, it gets defeated by the tropical weather of the country. - Mold and Mildew Growth
Due to the humidity, lots of mold and mildew accumulate under the paint. That makes it flake and crack over time. It usually happens in the most ventilated places, like bathrooms and basements.
Let’s get to professionally fix cracked painting in Singapore.
How to fix the Cracked Paint in Singapore? Expert Step-By-Step Guide!
This expert guide shows you how to repair cracked paintings in Singapore professionally.
1. Know how much is the damage:
Until you know how severe the damage is, you won’t get a clue about the best way of repairing it. Therefore, thoroughly check the damage by inspecting if there are superficial hairline cracks or deeper fissures that usually happen due to structural damage.
If there are serious structural damages, then you should contact any professional contractors who can help you repair them.
2. Get all the tools you Need
If the damage is to the paint, like hairlines or cracks, then get all the required tools ready. Like:
- Paint scraper or putty knife,
- Sandpaper of varying grits, a
- Quality filler or spackling compound,
- primer, matching paint,
- Appropriate brushes or rollers.
When you have all these tools ready, you’re all set to fix your cracked paint.
3. Remove Loose or Flaking Paint
Now, get a paint scraper and carefully, gently remove any loose or peeling paint around the cracks. This will prevent any more peeling in the feature and also prepare a smooth surface for applying new paint.
Remove the unstable paint completely and make sure the edges are smooth so that the new paint can perfectly blend with the old paint.
4. Clean the Surface Thoroughly
When the loose paint is removed, get a mild detergent solution or a sponge to clean the dirt, dust, grime, and residue from the exposed surface. And lastly, rinse out the surface and let it dry completely.
5. Apply Filler to Cracks
Then, get a putty knife and apply suitable filler or the spackling compound to the cracks. Firmly press the compound into the cracks so that they’re completely filled and look smooth. Let the compound dry completely first.
6. Sand the Repaired Area
When the filler area has completely dried out, sand it to make it even smoother and align with the old surface. Start with a medium-grit sandpaper to remove any excess filler, and then move towards the fine-grit sandpaper for a polished finish.

7. Prime the Surface
In the areas you’ve repaired, apply high-quality prime to protect it from humidity and improve the paint adhesion. Let the prime dry for 2 to 4 hours. Generally, you’re given instructions by the primer manufacturer about how long you should leave it to get dry.
8. Paint the Repaired Area
The last step is to apply weatherproof, matching paint to the primed surface using any roller or brush. Apply one coat and let that dry for some time and then apply the next. Multiple coats may be required for better results.
The number of coats may depend on the type of paint. You can check the manufacturer’s instructions. Don’t apply multiple coats at once, as that could cause bubbling and peeling. That’s how to professionally fix cracked paint and prevent it from getting cracked again.
Final Words:
How to fix cracked paint in Singapore? Assess the Damage, Gather Materials, Remove Loose Paint, Clean the Surface, Apply Filler, Sand the Area, Prime the Surface, and Repaint. Follow every step carefully so that you can get the best finish after perfectly fixing the cracked paint. Let us answer some of your questions regarding the cracked paint fix.
Frequently Asked Questions
Probably it’s because of moisture or bad preparation. Make sure the walls are clean, use primer, and pick a paint that can handle Singapore’s heat.
No, the cracks will still show. You need to scrape, fill, sand, and prime the paint first, or you won’t get any results.
About a day or two. The work’s quick, but you need to wait for everything to dry properly.